Friday, 31 August 2012

Git-gel or back and forth


Git-Gel
The following pattern is usually refered to its turkish name of gelgit, or gitgel (the turks do not seem to bother which one is used), but was more commonly known as the "back and forth" . It is another of the rarer patterns produced by itself, but a whole lot of other patterns use it as an intermediate step

1- Make a stone pattern. There can be as many or as little colours as you like, but 2-4 are good enough.

2- Draw parallel lines up and down the bath, first across it's length, then it's width.
To quote an old book, this should "split and elongate the droplets of colours", so the spots are now drawn out into lines.

The pattern as it is now is known as a "Gitgel". It can be printes as it is, but it looks a bit plain on it's own, so it is customary to  add a slight shower of white spots . Some books define such a pattern as an "Antique straight" .

~Notes~
Some people run the stylus through the trough only once. you can d
Such a pattern is also done with rakes. Once the rake is passed through the bath, it is shifted slightly, so the teeth of the comb are now between the the tracks it has preiously made. The comb is drawn through it again, and the pattern is complete.

Saturday, 28 July 2012

Curl marbled paper

We now commence to the "drawn " patterns. These patterns are stone patterns which have been manupulated by drawing a stylus or comb through them. The smplest of them is the Curl

1- Make a stone pattern. The colours traditionally used were red, yellow, blue, and a fine sprinkle of white

2- Using the stylus, ( a paintbrush handle works) draws spiral shapes through the pattern.
~ Notes ~

A very ingenious method of making these papers quickily is to use a device called the "curl frame" . Basically, is consiists of a series of nails spaced some distance apart , attached to a board or lattice. When you wished to draw the pattern, you placed the frame in the size, and moved it in a spiral. Voilá! Perfect curls every time!

The pattern has been in use for an extremely long time. It was certantly made by the 18thc., and it was made up till the 19thc. Probably one reason why this pattern was invented was as a means of covering up imperfections in a "stone" pattern.  I like to imagine an early marbler, seeing a brush-hair in the bath, and picked it out, and creating a small disturbance in the pattern. To disguise it, he made a series of swirls along the affeacted area, and over the rest of the size to balance it out. And so , my children, that was how the curl pattern came about.... [ NOTE : the above is just a fanciful tale, a just-so story. I have good reason to belive that it contains not agrain of truth in it ]

Saturday, 30 June 2012

Italian

The Italian, or Hair-vein

The Italian is just another variety of Stone pattern, Which has white as it's dominant colour. The white is produced by sprinkling on, with a whisk, oxgall diluted with water.
1- Drop on a colour or two ( see below). Do not drop on a lot of colour, as this would prevent the gallwaterfrom spreading well.
2- Using a whisk, Sprinkle on some Gall water ( oxgall + water ). The gallwater should spread,  
and force the colour[s] on the size into fine, hairlike veins. If this does not happen, add     more oxgall.                                                                                 1-   Italian made with blue
Colour combinations
Blue ( see 1)
Red+ blue
Red+black
Red+yellow+Green+ Blue  ( see 2)
~Notes~
The fineness and eveness of the droplets of colour, are the key factor to the beauty of this pattern. The pattern should look like fine mesh or lace.
 To acheive this finess, you must hold the whisk high above the trough, as this will cause the droplets to fall down as a fine shower on the pattern.


                                                                                                     2- Italian made with many colours

Friday, 29 June 2012

Stone pattern

The Stone
Of all the patterns of marbled paper, this one is the simplest. It simply involves dropping colours on the size, and printing the sheet as it is
 This pattern is also amongst the most versatile. Over the centuries, it has been made in every possible colour combination, and size.
 I should not mention all the colour combinations in which this pattern can be made, as to do so would be both useless and tedious, as ones taste is usually sufficient.However, one version of this pattern is worth mentioning- The English spot
 The Engish spot pattern, as I call it, had a surprisingly long lifespan. examples form the late 17thc. are almost identaical to the ones produced in the late 19thc.


Endpapers of book, late 18thc[?]
1- Drop red on the bath.
2- Drop on some yellow
3- Drop on black
 In later times, the colours were often swirled about randomly at this stage
4- Drop on some Dark green. This colour should have a bit more gall than the other colours.
5- Sprinkle on purple. Do not put a lot of gall into this colour, as the colour should remain in small spots
6- If you please, sprinkle on a shower of fine white spots

 ~Notes~
You can control the size of the droplets of colour by using various tools. Whisks give very fine drops. artists brushes, larger droplets.
 The last colour applied to a stone pattern is the predominating colour, unless the amounts of colours used vary enormously.

Friday, 1 June 2012

marbling combs- Woolnough's method

The great 19thc. marbler, Charles woolnough, gave us in his book "the whole art of marbling " a method of making combs. The combs produced here can be made very fine indeed, and are of a superior class.
 To make the combs, you must take a, piece of paper as long as you intend to make the comb, and enogh needles to make the comb ( 2 needles per centimeter produce a very good comb)

1-Fold the paper in half.
2- Then,  fold the back the part you previously folded, about 4cm creating an "M" shape in the paper

3- Now, draw a line about 1 cm. from the edge. This line will be folded back to hold the needles in place later. Now, mark off sections on the line, where you want the needles to be.

Stick the needles into the paper, like so.


Once the whole comb has it's needles stuck into it, you fold back the margin of paper that you made in the third step, thus causing the needles to stick out, like a comb. 

Make sure that the needles are straight and stick out evenly form the paper.

( N.B you can make the blunt ends of the needles point outwards- it's your choice)
Usually, as this point, the comb would be secured with a strip of glued paper. However, There is a much more permanent method - HOT GLUE...

Cover a bar of wood in hot glue, and stick the comb in it.

Once the glue has solidified, you can pull the paper away, to reveal a very good comb

Thursday, 31 May 2012

To marble the paper

Now, we have went through all the important preparatory steps , we go on to the actual parocess of Marbling.  If this is your first attempt, start out with a few colours, at most three. Mix them and test them as per;
 Fill your through with size to about 3-6 cm. of size.  Make sure that it is warmish.

 Every time before tou want to marble a sheet, you must "skim"the size, by passing a thin slat of wood, or strip of paper over the surface of the size. This must be done, as the size develops a "skin", ( like in a soup), and this skin will interfere with your colours.

 
 Drop on your first colour. It should spread out .

 Drop on the second colour. It should spread over the first, and push it into a "vein" ( see the testing stage)

Drop on the third, if you have one.

What you have now made is called a "stone" pattern, due to it's resemblance to the coloured forms in stones like agate.

It is now time to transfer the design to a sheet of paper.

 Take a sheet of paper previously alumed,and hold it by opposite corners.
Lay the sheet ( A) , alumed side down,  on the bath.
This is done by putting the corner nearest to you on the surface of the bath. ( C) Then, let down the other corner (B) in one smooth motion.

The sheet may be removed from the bath. It is then rinsed gently with water, (to remove the size) and left to dry.

The sheet should be placed on a board, set at an angle, to dry. This allows the water and excess colours to run off. This makes the paper look brighter.
 You can then proceed to marble the next sheet, by repeating the above steps. Just remember to skim the size before appling the colours.

Once you have obtained a relative mastery of doing this, you can proceed to more complex patterns. Just remember,
Nothing ventured , Nothing gained!

Wednesday, 16 May 2012

Preparing and testing the colours

Before the gouaches and watercolours can be used for marbling, they must be diluted, and mixed with Ox-gall. However, if you are using water-based marbling paint , you do not need to dilute them, but simply mix in gall.

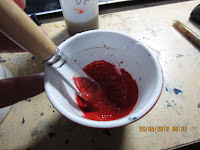
1-take a small amount of the gouache/watercolour, and squeeze it into the cup.
2- add in a few drops of gall. Six or so drops is a good starting point, but some colours need more gall than others.

steps 1 & 2
3- mix well with a brush
4- add in water to fill the cup, stirring all the while.

Now, Preparing the colours requires some degree of skill. Some pigmnts ( like the cadmiums and some earths) are dense in nature, and so need to be diluted more. Others, like the platato colours, are light by nature, and therefore need less gall.

Once the colours are mixed, you can begin testing them.

Firstly, "skim "the size. To do this, drag a piece of paper or a slat of wood over the size. This is done to remove the "skin" on the size, ( much like a soup), which will stop the colours from spreading.

Then drop on your first colour. It should spread like this; to a circle about 2-3 inches across

1st colour
The second color you intend to use must have a little more gall than in the first so that it can spread out over the first. 

2nd colour on
Do the same with your third and fourth colours. [if you have them] In either case, the colour should not sink, but spread over the colour previously put on.  Keep this order in mind whan you apply the colours during marbling. 

                                              3rd colour on                                 4th colour on
 There is no fixed amount of gall to be used. Some colours require more than others. However, If you are using HUGE amonts of gall, to no effect, something is amiss. Either
1- Your colours are too thick  - Try watering them down
2- The gall is weak. This is a common problem with gall meant for watercolour. - switch to a diffent brand, or one from a marbling supplier.

 If, however, the colours do not spread much, and you have found that the gall is not the culprit, then there is something wrong with the size.
 3- The size is too thick - Add some water to thin it down
 4- Size too cold- add some hot water
 5- Did you skim the size?

Sometimes, you may find that the colours look grainy on the size. Not to worry, add some drops of alcohol.