Thursday, 31 May 2012

To marble the paper

Now, we have went through all the important preparatory steps , we go on to the actual parocess of Marbling.  If this is your first attempt, start out with a few colours, at most three. Mix them and test them as per;
 Fill your through with size to about 3-6 cm. of size.  Make sure that it is warmish.

 Every time before tou want to marble a sheet, you must "skim"the size, by passing a thin slat of wood, or strip of paper over the surface of the size. This must be done, as the size develops a "skin", ( like in a soup), and this skin will interfere with your colours.

 
 Drop on your first colour. It should spread out .

 Drop on the second colour. It should spread over the first, and push it into a "vein" ( see the testing stage)

Drop on the third, if you have one.

What you have now made is called a "stone" pattern, due to it's resemblance to the coloured forms in stones like agate.

It is now time to transfer the design to a sheet of paper.

 Take a sheet of paper previously alumed,and hold it by opposite corners.
Lay the sheet ( A) , alumed side down,  on the bath.
This is done by putting the corner nearest to you on the surface of the bath. ( C) Then, let down the other corner (B) in one smooth motion.

The sheet may be removed from the bath. It is then rinsed gently with water, (to remove the size) and left to dry.

The sheet should be placed on a board, set at an angle, to dry. This allows the water and excess colours to run off. This makes the paper look brighter.
 You can then proceed to marble the next sheet, by repeating the above steps. Just remember to skim the size before appling the colours.

Once you have obtained a relative mastery of doing this, you can proceed to more complex patterns. Just remember,
Nothing ventured , Nothing gained!

Wednesday, 16 May 2012

Preparing and testing the colours

Before the gouaches and watercolours can be used for marbling, they must be diluted, and mixed with Ox-gall. However, if you are using water-based marbling paint , you do not need to dilute them, but simply mix in gall.

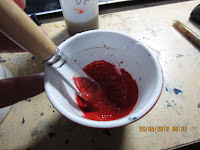
1-take a small amount of the gouache/watercolour, and squeeze it into the cup.
2- add in a few drops of gall. Six or so drops is a good starting point, but some colours need more gall than others.

steps 1 & 2
3- mix well with a brush
4- add in water to fill the cup, stirring all the while.

Now, Preparing the colours requires some degree of skill. Some pigmnts ( like the cadmiums and some earths) are dense in nature, and so need to be diluted more. Others, like the platato colours, are light by nature, and therefore need less gall.

Once the colours are mixed, you can begin testing them.

Firstly, "skim "the size. To do this, drag a piece of paper or a slat of wood over the size. This is done to remove the "skin" on the size, ( much like a soup), which will stop the colours from spreading.

Then drop on your first colour. It should spread like this; to a circle about 2-3 inches across

1st colour
The second color you intend to use must have a little more gall than in the first so that it can spread out over the first. 

2nd colour on
Do the same with your third and fourth colours. [if you have them] In either case, the colour should not sink, but spread over the colour previously put on.  Keep this order in mind whan you apply the colours during marbling. 

                                              3rd colour on                                 4th colour on
 There is no fixed amount of gall to be used. Some colours require more than others. However, If you are using HUGE amonts of gall, to no effect, something is amiss. Either
1- Your colours are too thick  - Try watering them down
2- The gall is weak. This is a common problem with gall meant for watercolour. - switch to a diffent brand, or one from a marbling supplier.

 If, however, the colours do not spread much, and you have found that the gall is not the culprit, then there is something wrong with the size.
 3- The size is too thick - Add some water to thin it down
 4- Size too cold- add some hot water
 5- Did you skim the size?

Sometimes, you may find that the colours look grainy on the size. Not to worry, add some drops of alcohol.

Monday, 30 April 2012

paper

The paper used here is very much a matter of what you have available, what you intend to make out of the finished product, and what you can afford. I prefer machine- made watercolour or sketching paper, for it is cheap enough , but thick enough to survive the wetting.  Expensive handmade papers are for most purposes,  a waste of money here,  unless the use that you intend to put the marbled paper to forces you to utilise this paper.  The reason for this is because expensive sheets may be spoilt by an errant air- bubble or similar fault.
Another thing the marbler must take note of is the fact that some of the papers on the market are heavily buffered against acid. This is a disadvantage to the marbler, for the alum is mildly  acidic in nature , and the buffered paper would neutralise the alum, and as a result, render it useless.
Because of the alum, marbled paper is, naturally, a bit acidic, but let that not worry you, because most purposes so not require such a level of acid-freeness, and besides, I posses samples of marbled paper from 1851, which are as clean and bright as ever, and the book to which they are attached shows no sign of deterioration.
Also, avoid the shiny or overly sized papers, for, they  would reject the alum, and the colours.
However, I can only do so much. You must experiment  to find the best sort.


The paints

The paints used for marbling fall mainly into two categories, watercolours/gouaches and acryllics. Acrylics are more often used today, as they are waterproof , and can be used to marble fabric. However, watercolours are simpler to use, and give a wider range of patterns .
 Some paints work better for marbling than others. For example, one paint may spread uncontrollabaly, another would refuse to spread at all, and some others may be very pale.
 Generaly, the best paints to use are artist's watercolours ( as opposed to student's watercolours), or gouaches ( Gouache is simply a opaque watercolour) . These paints give more consistent results, and are less likely to fade. Brands like Windsor & Newton's are of the highest quality, but are very expensive. The next best type would be Daler-Rowney's designer's gouache . This paint is quite cheap, and produces decent results.

 However, even within the same brand, diffrent pigments behave in very diffrent ways. Some spread like mad, and dominate the paper ( like phlatato blue), others are heavy and dense, refusing to spread  much. To make matters even more confusing, companies may change the paint formula, thus making a previously good paint useless.

To that end, I shall furnish you with a list of colours that have been known to work. The following list is but a guide, and more colours can be introduced to please the fancy

yellows
Yellow Ochere

Reds
 red earth
cadmium red
alizarin crimson

blues
prussian blue
phlatato blue
indigo
ultramarine

greens
A mixture of phlatato blue and yell. ochere
phlatato green

Black
lampblack,
ivory black
 note; a little prussian blue phlatato blue or indigo can be mixed into the black to make it denser
Brown
burnt umber
burnt ocher
umber

 Other colours, like orange and purple, can be created by mixing the appopriate colours.

Thursday, 19 April 2012

Combs for marbling

pair of combs ( L and R), and a rake ( center)

A comb, as its name implies, is a series of wires, set at equal distances to each other, in a piece of pasteboard or wood, like a comb used for hair. A rake is essentially a comb in which the teeth are spaced more than an inch apart. The combs and rakes are essential for the making of some patterns.
There are several methods of making combs. Here is the method I use;

You would need a piece of cardboard, about the thickness used for book covers ( A) , & hairpins ( B)
after marking off the sections between the teeth , slot the hairpins into the piece of cardboard , along the markings, like so;


another view
Repeat the process along the length of the cardboard.


Then,making sureb that all the needles are alagined properly, and all protrude the same distance,  tape the structure with duct tape to secure it.


Wednesday, 18 April 2012

Trough and assorted equipment

Equipment for marbling
Bath, or trough-  .  A tray, the size of the paper you intend to marble, but with a margin of a few inches around. Seed trays have been used, and so have enamelled roasting tins, or photographic hypo tins. The tray has to be more than an inch deep
trough, in situ, half fill'd with size


Pots-  little porcelain pots, at are necessary for holding the colour for marbling. The size of the pots depends on the amount of paper you marble, larger amounts needing larger pots. The pots must be at least 5cm across , 3 cm deep, but  teacups work very well too. You need one for each colour you intend to use.
Eye- droppers. ( A) The eyedroppers are indispensable for laying on the colour, as they are the most straightforward method to do so.
eyedroppers, brushes, stylus
Bushes, ( B) are generally made of hog-hair. (but horsehair was used in former times , and sometimes used today). they are used to sprinkle the colours on the bath, and mix them around. You need one for each colour.
Stylus .( C ) A knitting needle , or some other such implement. Should be about 3-4 mm thick .  paintbrush handles are good if there is nothing else.

Tuesday, 17 April 2012

Alum

alum, in powder ( left) and lump ( right) form
Alum is the third most important substance in marbling, after the gall and the size. It makes the colours adhere to the paper.
 Marbling on tragacanth does not requore alum  but the paper must be dampened slighly to accept the colour. The reasons behind this I have not been able to find out,( but it might, historicaly have something to do with the fact that the paper used being more absorbent). However, marbling on Carrageen requires the substance to be dissolved in water, and sponged on the paper.  The process imparts some degree of acidity to the paper .  As a result, some binders tend to avoid them. However, for odinary uses, the acidity is negligable.
There are two kinds of alum , potash alum (potassium aluminium sulfate), or just plain alum ( aluminium sulafte). Both work well.

Take a heaped tablespoon of powdered alum , and dissolve it in a cup of hot water. Stir to dissolve. ( this has a tendency to heat up the water, so be careful) .
Now, take the sheets of paper you intend to marble, and mark the side you do not want to marble with a pencil. This helps you distinguish which side to lay on the size.

Soak a sponge in alum, and apply it to the side that is not marked. Lay it flat to dry.

The paper can be marbled when it is dry, or slightly moist.