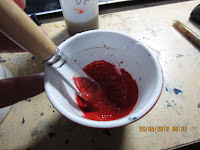
Fill your through with size to about 3-6 cm. of size. Make sure that it is warmish.
Every time before tou want to marble a sheet, you must "skim"the size, by passing a thin slat of wood, or strip of paper over the surface of the size. This must be done, as the size develops a "skin", ( like in a soup), and this skin will interfere with your colours.
Drop on your first colour. It should spread out .
Drop on the second colour. It should spread over the first, and push it into a "vein" ( see the testing stage)
Drop on the third, if you have one.
What you have now made is called a "stone" pattern, due to it's resemblance to the coloured forms in stones like agate.
It is now time to transfer the design to a sheet of paper.
Take a sheet of paper previously alumed,and hold it by opposite corners.
Lay the sheet ( A) , alumed side down, on the bath.
This is done by putting the corner nearest to you on the surface of the bath. ( C) Then, let down the other corner (B) in one smooth motion.
The sheet may be removed from the bath. It is then rinsed gently with water, (to remove the size) and left to dry.
The sheet should be placed on a board, set at an angle, to dry. This allows the water and excess colours to run off. This makes the paper look brighter.
You can then proceed to marble the next sheet, by repeating the above steps. Just remember to skim the size before appling the colours.
Once you have obtained a relative mastery of doing this, you can proceed to more complex patterns. Just remember,
Nothing ventured , Nothing gained!


